Quite a few years ago, I walked into the back room of a used instrument store. The employees had just finished moving the inventory to their location from another branch, which had closed. The room was an absolute disaster, with huge cartons stacked to the ceiling, parts and instruments wall-to-wall.. really a shambles. The young employees had been loading trucks and hauling inventory for a couple of days, and just cramming the stuff wherever they could find space. These were the sales guys, and they were less than careful with all but the most expensive guitars.
I was friendly with the store management, and went back to see the new stuff. Appalling, at best.. At any rate, as I was perusing all the "new" stuff, I found an old violin- crushed on the concrete floor between two huge crates of "stuff". It was completely demolished, the neck block broken, the top and back were cracked and detached. The sides were intact, but pushed horribly out of shape. What a shame.. what a disaster... They were all laughing about it- it was all I could do to keep from crying. This had been a hand made violin, with a date stamped inside along with the builder's marks.. Obviously made of fine tiger stripe maple and spruce, hand carved.. and here these idiots were, laughing..
I could see it had once been a pretty good fiddle, and had done minor violin repairs in the past, but it was totaled. I bought the pieces for $10.00, and took them home. I had no idea if it was possible to repair it, with all the damage it was a daunting task. I had no jigs, no experience with this type of extensive damage, and no idea if it was even worth the effort.. but I gave it a try anyway. At that time I didn't have any experience with hot hide glue, and figured I'd put it back together with CA glue.. not my best move, but live and learn...
I started by rebuilding the structural components (neck block, tail block had both been cracked into several pieces) and sanding/filing them back into shape. Then I took little shims of spruce, and made splints (like a butterfly stitch from the school nurse) to reinforce the cracks in the soundboard. Once the cracks had been glued, and the splints applied, I sanded the splints down to paper thickness, and blended the ends down to nothing. I did these with opposing grain direction, to increase strength, and kept them as small as I dared. I had seen this technique on other violins, (professionally repaired) and it just made sense to be as non-invasive as possible. I figured every bit of extra wood would have an adverse effect on the resonance of the top. Too bad I only had carpenters white glue and CA glue. If I had known about the hide glue back then, the repairs would have been "proper".. but I went ahead and used white glue for these, and it has held up over the years.
Once I was able to reassemble the sides with the neck and tail blocks, I steamed the parts over a boiling pot of water on the stove, and bent everything back into shape as well as I could. Again, I would have done things differently today, but it was mostly successful. I didn't have a point of reference to get the centerline aligned, and no clamps to hold everything together properly, so I had to wing it.. I reglued the neck into the repaired block, and said a prayer... eyeballing the neck angle and alignment. It ended up to be OK, but it isn't perfect. Luckily, it was close enough to compensate with the bridge carve. The pegbox favors the treble side a little, throwing the strings slightly off center, but it was pretty close- as close as I could get it by eye. It works, and feels fine, but if you look closely you can tell something is a little funky with the angles. 99% of people would never know..
So I proceeded to glue the sides, blocks, etc to the back of the fiddle with CA glue.. At least I could control the fit, do a section, hold it in place with my hands, then move to the next section.. Eventually, I made it all the way around.
Then I had to try to fit the repaired top on... this proved to be a challenge, as the sides were still imperfect- and now I could only compromise the fit as I went along.. I reattached the bass bar, made a final pass on the inside with sandpaper, and proceeded to glue it up, again with CA glue. Since I didn't have any spool clamps, this was the best I could do.. glue an inch, squeeze it until the glue set up. Repeat.. Just a little tedious..

At any rate, eventually I made my way all around the top- pushing the sides into alignment as best I could, trying to make sure that they were as straight as I could get them. In retrospect, I can't believe I did as well as I did under the circumstances..
Once I had reinstalled the fingerboard, I carved a bridge and fitted it to the top (like doing an archtop bridge on a jazz guitar), installed the end pin and tailpiece, bought new ebony tuning pegs (fitting those without proper tools was a real trip.. I own a pegbox reamer now), and making a new sound post, then strung it up.. holding my breath.. I didn't know if it would self destruct, or really what it would do.. To my amazement, it worked!
After adjusting the top of the bridge for height, radius, and thickness, I was able to play it effortlessly, and it sounded better than any of my other fiddles! I went out and bought some really expensive violin strings (Pirastro Obligato), and told my friend about the rebuild.. He makes fine violins, and looked at me in disbelief when I told him the story..
Now years have passed, the fiddle has been fitted with a Fishman pickup and fine tuners for all the strings, it lasted Chris through High School, and has been gigged countless times. Then it sat in the case for a couple of years, untouched.
I pulled it out a few months ago, thinking I'd start playing it again, and to my dismay the seam on the back had opened up. I loosened the strings, and put it back in the case.. worried that I had ruined it by using CA glue. I was worried it wouldn't be possible to fix it, as CA glue acts as a primer, and seals the pores of the wood. Fast forward to the other day...
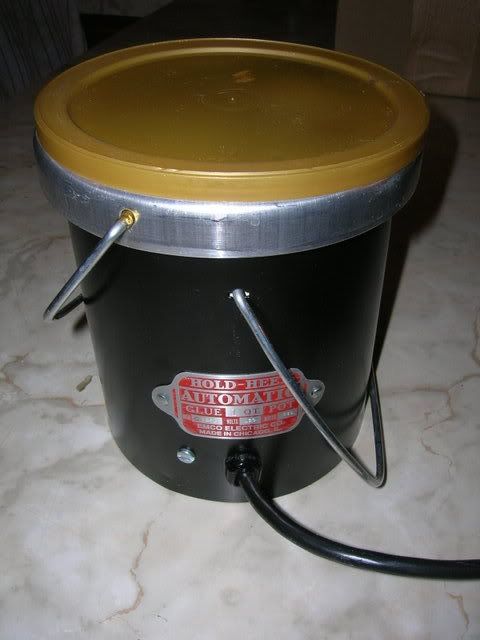
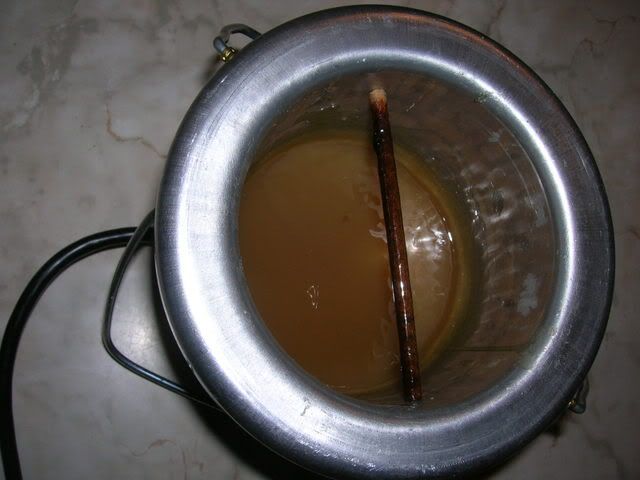
Chris' fiancee was working on her own violin, and needed the fingerboard attached. They asked if I would get the glue pot going, and help them with their project. I agreed to do so, and figured I would give my open seam a try, although I didn't know what would happen.
I glued up her fingerboard, then forced the seam open on my old fiddle with a toothpick. Then I forced the hot hide glue into the open seam, pulled the toothpick out, wiped the excess glue off the surface, and clamped it shut with spool clamps. I let it sit for a couple of hours, then released the clamps to inspect the damage (I mean
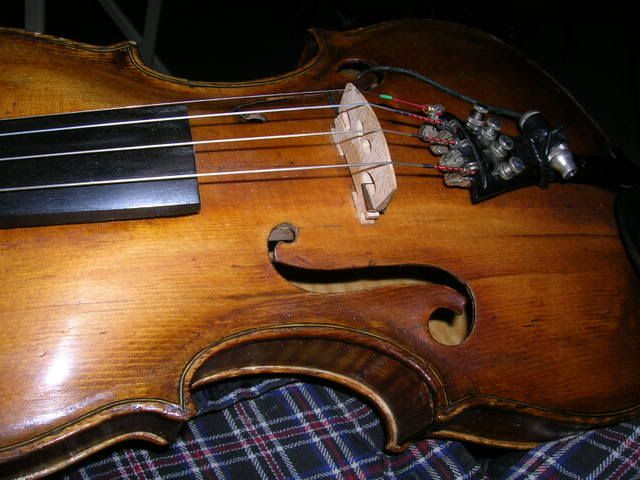
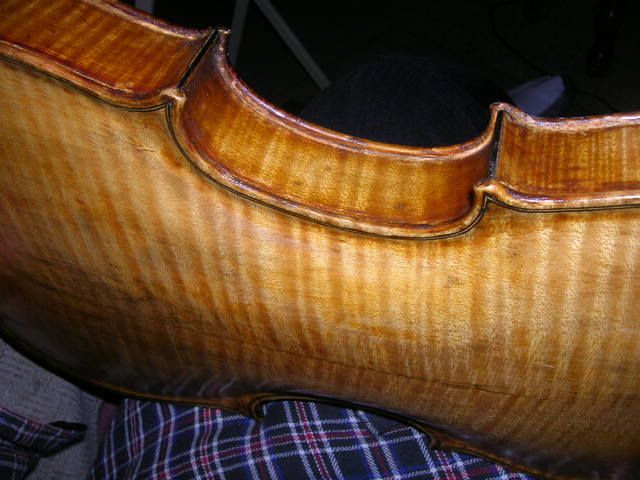
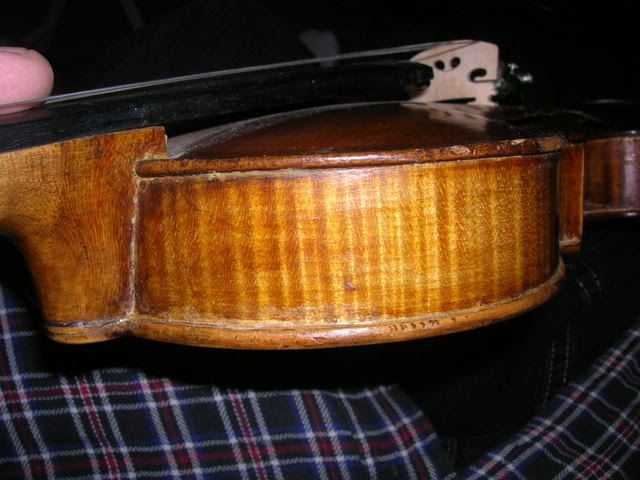
repair). I scraped away the rest of the glue mess, and was encouraged to see the seam actually looked better than my first attempt. I reinstalled the clamps, and let it set overnight. The next day I removed the clamps and tuned it up to pitch. Surprisingly, the hide glue held.. Only time will show if it will hang together, but it is encouraging. Here are a couple of shots of the fiddle, taken this morning. By the way, it still sounds fantastic!
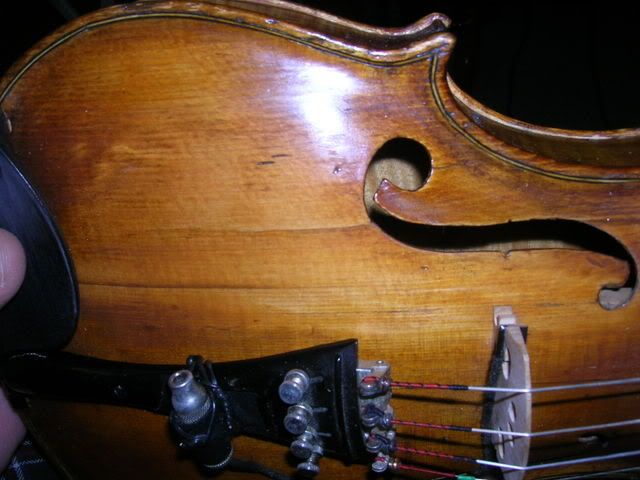
And here's that pesky seam, as it sits right now...


 At any rate, eventually I made my way all around the top- pushing the sides into alignment as best I could, trying to make sure that they were as straight as I could get them. In retrospect, I can't believe I did as well as I did under the circumstances..